Kubernetes Namespaces: How to Organize and Secure Your Applications
Kubernetes is a powerful container orchestration solution that is increasingly being used to manage containerized applications at scale. Kubernetes offers a robust collection of features for deploying, scaling, and managing containerized applications, but with great power comes great complexity. When the number of apps and services operating on a Kubernetes cluster grows, it can be difficult to keep track of all the resources, especially when various teams use the same cluster.
This is where Kubernetes namespaces come in. Namespaces are a way to divide a Kubernetes cluster into virtual clusters, allowing you to build isolated environments for different applications or teams. Namespaces allow you to isolate resources, control access, and simplify resource management inside a single Kubernetes cluster.
In this blog article, we will look at what Kubernetes namespaces are, why they are important, and how to use them well
What are Namespaces?
A Kubernetes namespace is a virtual cluster within a Kubernetes cluster. It allows you to divide a Kubernetes cluster into smaller, self-contained groups. Each namespace has its own set of resources, including pods, services, and deployments, which are isolated from resources in other namespaces. Namespaces may be used to manage and isolate resources by application, environment, team, or any other logical grouping.
How Namespaces are implemented in Kubernetes?
Namespaces are used in Kubernetes to divide cluster resources across various users (through role-based access management) or projects (via namespaces). Kubernetes namespaces allow you to divide a single physical cluster into numerous virtual clusters. Each namespace gives a different scope for the resources it includes, which helps in resource organization and avoids naming conflicts.
Kubernetes comes with four namespaces by default:
- Default: This is the namespace where Kubernetes resources are created by default if no other namespace is specified.
- Kube-system: The Kubernetes system resources, such as the API server, controller manager, and scheduler, are located under this namespace.
- Kube-public: This namespace is generated automatically and is accessible to all users. It holds public information about the cluster, such as the API server’s public key.
- Kube-node-lease: This namespace is used to monitor the health of cluster nodes.
These namespaces are created automatically by Kubernetes and are required for the cluster to function properly. You can, however, create your own namespaces to better organize your resources.
Why Use Namespaces?
This can come in handy in a variety of situations:
- Isolation of resources: Namespaces allow you to separate resources from one another. When running many apps on the same cluster, this can be advantageous since it prevents them from interfering with one another.
- Team management: Use namespaces to arrange resources by the team. This allows various teams to handle their own resources independently of one another.
- Separation of resources by environment: Namespaces may be used to divide resources between contexts such as production and development. This can help prevent accidental modifications to production resources.
- Security: Namespaces enable security by restricting access to resources within a namespace. This can help prevent unauthorized access to important resources.
Namespace Creation and Management
1) Using the kubectl command to create namespaces:
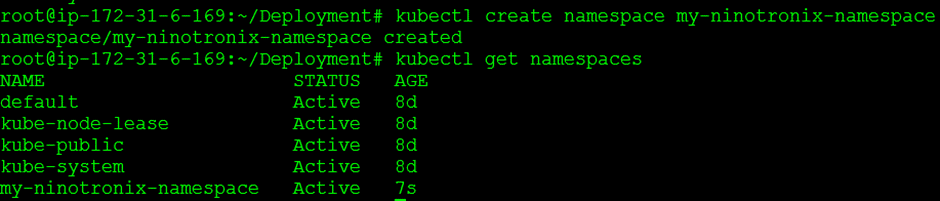
The kubectl command can be used to create a new namespace in Kubernetes. Here’s an example of how to create a “my-ninotronix-namespace”
$ kubectl create namespace my-ninotronix-namespace
Here’s an example YAML file for deploying a nginx web server in a specified namespace:
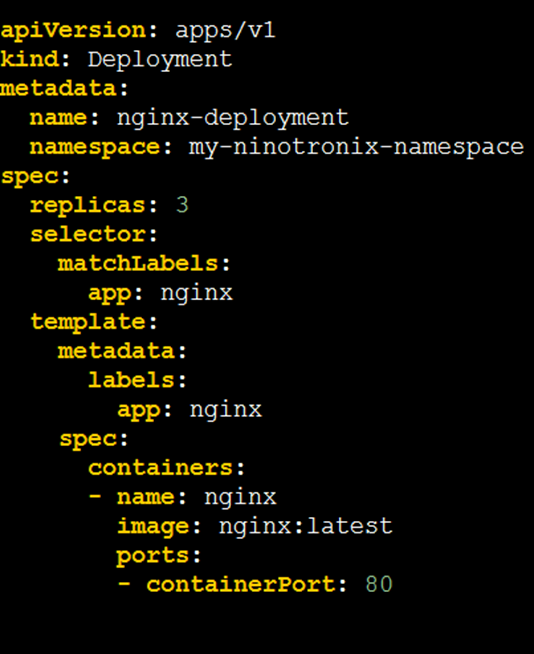
The metadata namespace property in this YAML file is set to my-ninotronix-namespace, indicating that the Deployment should be created in my-ninotronix-namespace namespace.
You can execute the kubectl apply command to apply this YAML file:
$ kubectl apply -f nginx-deployment.yaml
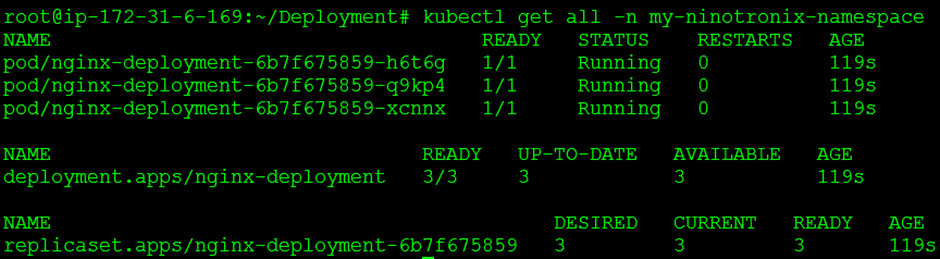
This will create a nginx web server deployment with three replicas in the my-ninotronix-namespace namespace.
$ kubectl get all –n my-ninotronix-namespaces
2) Viewing and Modifying Namespaces:
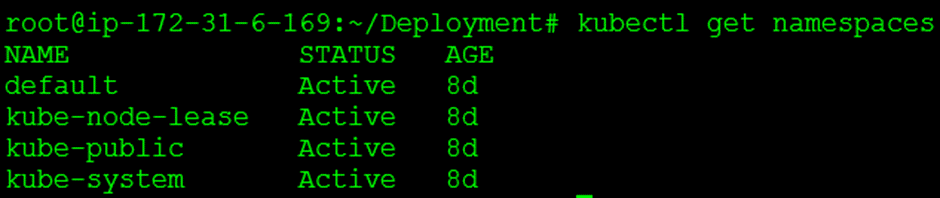
To get a list of all the namespaces in your Kubernetes cluster, use the following command:
$ kubectl get namespaces
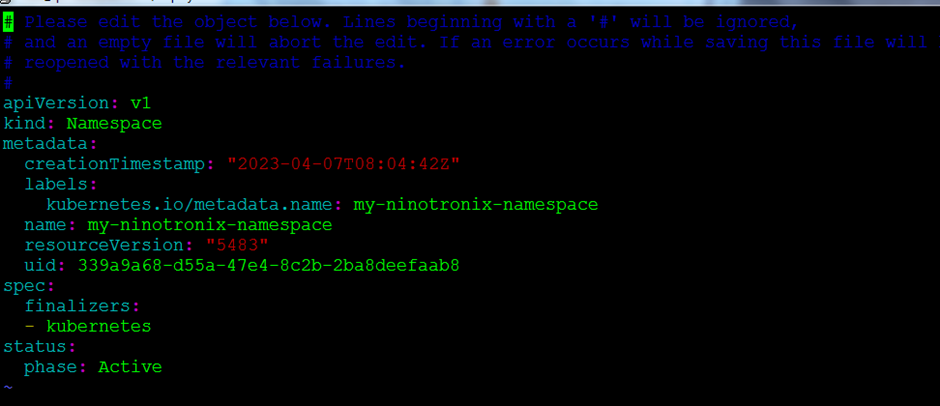
To change a namespace, use the kubectl edit command. Here’s an example of how to modify the “my-ninotronix-namespace” namespace:
$ kubectl edit namespace my-ninotronix-namespace
3) Deleting Namespaces:
To delete a namespace, use the kubectl delete command. Here’s an example of how to delete the “my-ninotronix-namespace” namespace.
$ kubectl delete namespace my-ninotronix-namespace
It is important to note that deleting a namespace will also delete any resources linked with it, therefore double-check before deleting a namespace.
Thank you for reading this article on Kubernetes namespaces; we hope you found it informative and useful on your journey to learning Kubernetes. Please feel free to contact us if you have any queries or feedback.