
How to Get Started with Ansible: Installation and Configuration on Ubuntu
Ansible is a powerful open-source automation tool that enables system administrators and developers to scale the automation of system deployment, configuration, and management.
We will walk through setting up and configuring Ansible on Ubuntu in this blog article.
Step 1: Updating Ubuntu
The Ubuntu server has to be updated with the latest and most recent packages available. So, Use the following command to achieve this:
$ sudo apt update && sudo apt upgrade
Step 2: Installing Ansible
The next step is to set up Ansible on the Ubuntu server. The default-jre and python-pip packages, which are required by some Ansible modules.
Use the following commands to install Ansible and the needed packages:
$ sudo apt install default-jre –y
$ sudo apt install python-pip -y
Now, execute the following command to install Ansible:
$ sudo apt install ansible
When the installation is complete, execute the following command to check the Ansible version:
$ ansible –version

Step 3: Configuring Ansible
After installing Ansible, we need to configure it before we can use it.
Creating an inventory file:
An inventory file is a list of hosts that Ansible can manage. To create an inventory file, use the following command to create a new file called “hosts” in the /etc/ansible directory.
$ sudo nano /etc/ansible/hosts
You can provide the host’s IP address or hostname in the inventory file that you want to manage using Ansible. For example,
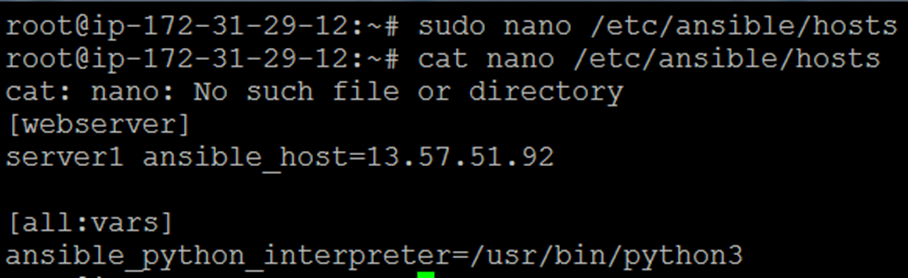
Close and save the hosts file.
To see a list of hosts in your Ansible inventory, use the following command:
$ ansible-inventory –list –y
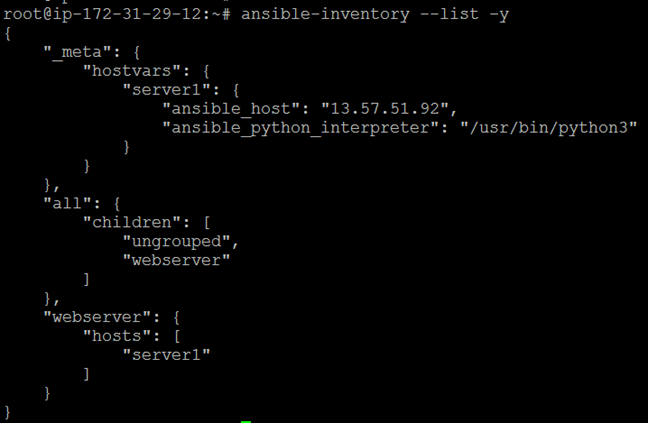
This command displays your Ansible inventory in YAML format.
Step 4: Copying the Public Key Manually
It involves manually copying the root user’s public key to the authorized keys file on each managed host. Below are the steps to follow:
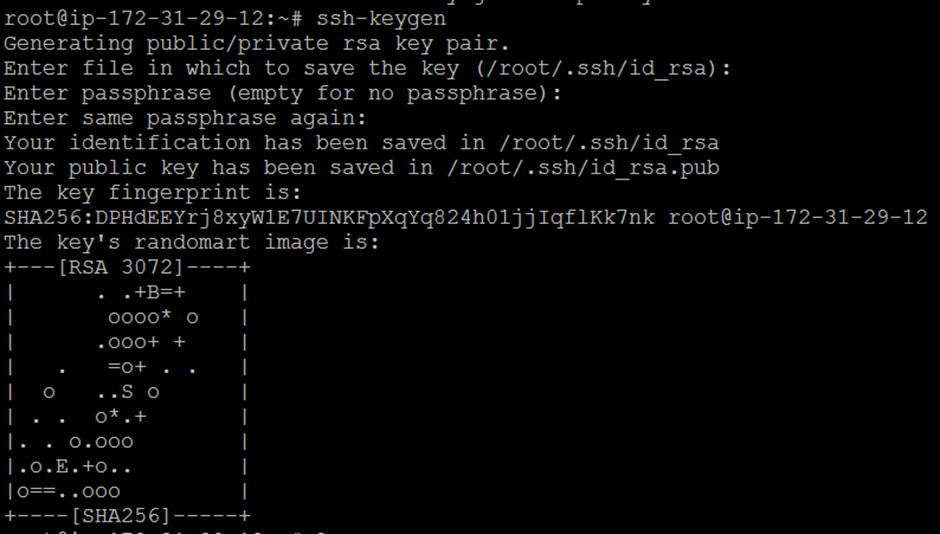
- Generate an SSH key pair:
Run the following command to generate an SSH key pair on the Ansible server.
$ ssh-keygen
This command creates a public and private key pair in the root user’s ~/.ssh/ directory.
- Copy the public key to the managed host:
By using the following command, you can copy the contents of the public key file (~/.ssh/id_rsa.pub) to the clipboard:
$ cat ~/.ssh/id_rsa.pub

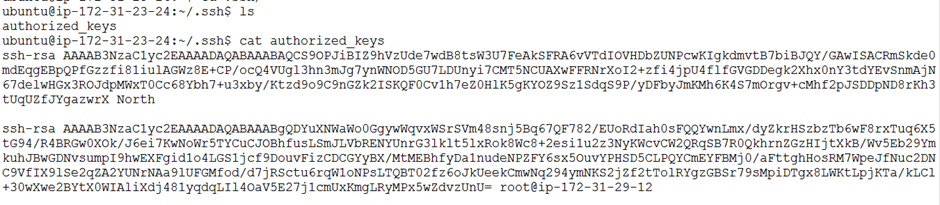
- Create the authorized keys file:
First Login into the managed host. If the ~/.ssh/ directory does not already exist on the managed host, use the following command to create it. Skip these steps if it already exist.
$ mkdir -p ~/.ssh/
And then, use the following command to create the authorized keys file:
$ touch ~/.ssh/authorized_keys
- Pasting the public key:
Now run the following command to open the authorized keys file in a text editor such as Nano or vi:
$ nano ~/.ssh/authorized_keys
Paste the contents of the clipboard into the authorized_keys file and save it.
- Set the right permissions:
Run the following commands to set the right permissions for the ~/.ssh/ directory and the authorized keys file:
$ chmod 700 ~/.ssh/
$ chmod 600 ~/.ssh/authorized_keys
Most of the time, you can find the file called authorized_keys on your managed node machine. If you don’t have it, just follow the instructions above will work. After copying the root user’s public key to the authorized keys file on each managed host, you should be capable of managing those hosts using Ansible
Step 5: Test Ansible connectivity
To test Ansible connectivity, run the following command:
$ ansible -m ping all -u ubuntu
This command will execute a connectivity test on all nodes in your inventory file (/etc/ansible/hosts), connecting as Ubuntu, using Ansible’s built-in ping module.

After you receive a “ping” response from a host, you’re ready to perform Ansible commands and playbooks on that server.
That’s all there is to this blog! Thank you for reading this far.